Tuesday, August 31, 2010

Super Stone

Step 1:  Secure bead head to the front of the hook.
Step 2:  Wrap thread to the back of the fly and tie in a 3" piece of copper wire.
Step 3:  Tie in 2 black goose biots so they form a "V" off of the back of the fly.
Step 4:  Tie in a piece of black swiss straw just in front of the goose biots and wire.
Step 5:  Wrap the tread to just in  front of the mid point of the hook shank and tie in centipede legs to each side.
Step 6:  Wrap the thread back to the rear of the fly and spin dubbing around the thread.
Step 7:  Wrap the thread with the dubbing on it all the way up to the front of the fly. Make sure the middle of the fly (in between the legs) is the fattest part of the fly. 
Step 8:  Wrap the copper wire around the body of the fly making sure to leave space in between raps so the black dubbing will show through. Tie off the copper wire wen it reaches the front of the fly and clip any extra wire.
Step 9:  Pull the swiss straw from the rear of the fly to the front and tie down just behind the bead head. The swish straw will create a back to the fly.
Step 10:  Tie 2 black goose biots in behind the beadhead. they should form a "V" wen tied in.  Once secured, clip the tag ends.
Step 11:  Spin a small amount of dubbing around the thread and wrap dubbing from the base of the goose biots to the bead head to hide the thread wrapping that shows from tying in the goose biots and swish straw. After the dubbing is wrapped around the fly, whip finish and apply head cement.

Hook: Daiichi size 10 style 1550 wet/nymph hooks
Thread: Black ultra thread
Materials: 4 black goose biots, 3" piece of medium copper wire, black centipede legs, tungsten bead head, swish straw, head cement, and black dubbing.
Tools: bobbin, scissors, and whip finish tool

This stone fly pattern works well for many species of fish. Where ever there are stoneflies this pattern works well. I use this pattern in size 10 and 12 for steelhead during the fall, winter, and spring. It can be tied in any size and any color combination. It can be tied without a bead head, but I like the bead head because it will get the fly down to the bottom where it needs to be faster and doesn't require the use of split shot. Stonefly patterns are a must for everyones fly box and this is my favorite and most effective stonefly pattern in my box.

Hopper Pattern

Step 1:  Glue strips of craft foam together. After they are glued together use scissors to trim to the shape of the body.
Step 2:  Wrap a base of thread on the hook shank. Tie the body down by making 3 wraps around the body and hook shank.
Step 3:  Tie an overhand knot into 4 centipede legs. After the knot is tied cut all but one tag end.
Step 4:  Tie in the centipede legs in the same place that the body is secured. (tie the legs in so that the part with 4 legs is closest to the body). After legs are tied in clip the 4 tag ends leaving the section that has the overhand knot is remaining. Do the same on the other side of the body.
Step 5:  wrap the thread around the hook shank until the thread is about 1/8 " from where the legs were tied in and secure the body there with 3 wraps.
Step 6:  Where the body is secured for the second time tie in a pinch of deer hair.  (the deer hair will imitate wings).
Step 7:  Wrap the thread up the hook shank again until it is 1/8" from where the deer hair was tied in and secure the body by wrapping the thread around the foam and hook shank 3 times.
Step 8:  Take 2 pinches of pheasant tail and tie them in in the same place where the body was secured. (the two pinches of pheasant tail should form a "V" when tied in). The pheasant tail will imitate the wing casing.
Step 9:  In the same place where the pheasant tail is tied in, tie in centipede legs so that they form a "V".  Tie in legs to both sides.
Step 10:  Wrap the thread around the hook shank to the front of the fly just behind the eye and whip finish..
Step 11:  Glue on eyes on the front section of the fly and apply head cement on the entire bottom of the fly body.
Hook: Daiichi Size 8 No. 2220 hook
Thread: Black ultra thread
Materials: 3 two inch pieces of craft foam (2 brown, 1 Black), 4 centipede legs, natural deer hair, natural pheasant tail, glue on eyes, hard as hull head cement
Tools: Bobbin, scissors, whip finish tool

This is a great hopper pattern that can be fished for all species that consume grass hoppers. I would recommend that liquid and powder floatant. First apply the liquid floatant to the deer hair and then dust the powder floatant onto the deer hair. This pattern can be fished alone, with a nymph dropper, or another dry fly trailer fly. I would recommend fishing this pattern with a dead drift to get the best results. This pattern can be tied in other colors that best imitate the coloration of the grass hoppers in the area being fished. Hopper patterns can be very affective in late summer and early fall, and I always make sure there are at least a few in my box.

Monday, August 30, 2010

Utah

While in Utah for a long weekend, I was able to fish the provo river. The provo river is an amazing fishery because of the abundance of bug-life which allows trout to become very healthy and strong. There are two sections to the provo river, the middle and lower provo. After fishing both, I am able to say that they fish completely different. While both being tail waters, the middle and lower provo are very different in that the middle fishes better in lower water, while the lower fishes just fine at higher and faster water levels. It is amazing how many big fish are in one stretch of river. With the right drift, rigging, and flies, it is possible to    hook 10 fish in a single pool even at this time of year. Put simply, the provo river is an insane fishery that I recommend everyone that has the chance to fish do so. If anyone is looking for a guide service I would recommend Wasatch Guide Service (http://www.wasatchguideservice.com/) . They know the river like the back of their hands and are able to help anyone interested in hooking up with big, wild brown and rainbow trout.

Here are some pictures.

This wild bow jumped about 4 times before it was brought it.
This beautiful bow was the nicest looking and one of the bigger sized bows  to the trip.
lengthy wild brown
18" wild brown

Bow with nice colors
Me holding a provo bow 
Not the nicest fish but after hiking 1.5 miles you appreciate a fish like this a whole lot more 
Fat bow
Me with a nice bow 
19" wild brown
Unfortunately this 21" brown jumped out of my hands right before the shot was taken so this shot of it in the net is as good as we can get.
Hiking through this terrain isn't easy but it takes you places where there are fish that have never been caught.
fly fishing magazine photo?

Wednesday, August 25, 2010

Jig Head Streamer

Step 1:  wrap a base of thread and tie in the end of a piece of marabou. Cut the extra marabou off and secure the tail.
Step 2:  tie in a 5" piece of hackle flash in the rear of the fly and wrap dubbing from the rear of the fly to the jig head
Step 3:  wrap the hackle flash around the dubbing body towards the front of the fly.  Tie off the end of the hackle flash and cut the tag end off.
Step 4:  Pull a pinch of ice dubbing and put 1 wrap in the middle of the pinch righ behind the jig head. repeat this until there are pinches of dubbing around the whole fly.
Step 5:  wrap the thread so it is in front of the dubbing and fold the ends  of the dubbing over  so that there is a dubbing skirt going towards the rear of the fly.
Step 6:  whip finish and apply head cement.

Hook: 1/32 oz. jig head
Thread: Chartreuse ultra thread
Materials: 5" piece of hackle flash, chartreuse ice dubbing, chartreuse marabou
Tools: bobbin, scissors, whip finish tool

This fly is a very affective fly is faster moving current because it is heavy enough that it will get to the bottom where the fish are faster that other patterns. It is also a great pattern to use in situations where the may be weeds or cover because it will swim hook tip up. I have found that fishing this pattern along the bottom bouncing it along rocks works the best, but a quick stripping action also works well. The best color combinations I have found are: white/black, green/white, chartreuse/black, and brown/white.

Midnight Mayhem


Step 1:  start by tying the dumbbell eyes onto the top of the hook shank and wrapping a bas of thread
step 2:  Cut a small piece of rabbit strip and tie the end in. Once the end of the rabbit strip  is tied down, rap the thread to towards the front of the fly and tie down the front of the rabbit strip
Step 3:  turn the vice so that the fly is upside down. Take ostrich herl and tie the ends in just behind that dumbbell eyes. Clip the ends once the ostrich herl is secured
Step 4:  Tie in a piece of cross cut rabbit strip just behind the dumbbell eyes.  Wrap the cross cut rabbit strip around the fly once. Tie it off and clip extra rabbit strip.

Step 5:  tie in flash marabou to each side of the fly in front of the dumbbell eyes
Step 6:  wrap thread so that it is behind the dumbbell eyes. Take the short ends of the flash marabou and pull them over top of the dumbbell eyes. make a few thread wraps to secure the short ends behind the dumbbell eyes. Wrap the thread back to the front of the fly. Create a tapered nose on the fly.
Step 7:  Whip finish and cement the head. Depending on what type of dumbbell eyes you use, you can use super glue to glue on reflective eyes to give the fly a better appearance. 

Hook: Daiichi No. 2220 size 8 hook
Thread: black ultra thread
Materials: dumbbell eyes, ostrich herl, cross cut rabbit strip, barred rabbit strip, flash marabou, and reflective eyes.
Tools: Bobbin, scissors, and whip finisher

This fly is a great streamer pattern that can be used at all times of the day. I like using this pattern on a tandem rig with a nymph trailer. It has great movement and is my go to fly. The best color combinations i have found are black/blue/white, red/black/white, red/white, green/black/white.

Afternoon Trip To Chautauqua


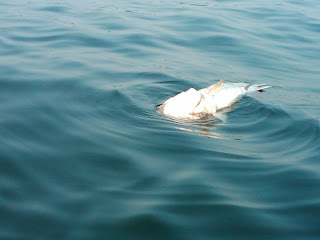
Lake Chautauqua is a lake that is 17 miles in length and consists of two basins, the north and south basins. The north basin is the deeper of the two with a maximum depth of 70 ft. and is a great walleye fishery even though the walleye is not a native species to the lake. By fishing the steep drop offs just above the thermocline, one can be very successful fishing for walleye and smallmouth bass. Fishing drop offs and fishing near docks has been the most successful tactic of the summer. Through this summer I have had success fishing streamer patterns in chartreuse, black, and blue, but I have also had a lot of success by fishing surface flies in the early morning for bass near weed edges and structure. I haven't caught a muskie yet and my closes encounter  was with a dead one. They are an amazing species and I will hopefully have some pictures of some in the future.

small walleye taken on chartreuse streamer

nice rock bass caught on a steelhead hammer nymph 


small mouth on surface popper


3 ft. Muskie unfortunately this one was dead